Welcome to Unit 6!
In this unit, you will learn how to implement state machines in Python. Achieving this is valuable for several reasons:
- You will be able to deepen your understanding about state machines in general.
- You will be able to solve arbitarily complex synchronization tasks in Python.
- You will have a framework for the implementation during the semester project.
Benefits of State Machines in Code
You have read before that developers sometimes realize that they should have used a state machine only after it is already too late. In general, state machines are useful also at the code level when there is a lot of concurrency going on, and a component needs to order a set of events that can come more or less in any order. Remember Richard Stallman when he said “if this message comes before that message… it took us years to get it right.” You may think that there is support for threads in most programming languages, and that this is enough to handle concurrency. However, sometimes also this support is very specific to certain problems and not simple to learn. Usually when learning Java, which has a really extensive API for concurrency, the concurrency part is considered the most difficult one, and most developers have to consider a book when doing more elaborate tasks. Just look at this:
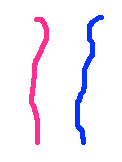
| Just two parallel threads. |
|

|
| Just two parallel threads, with one synchronization point. |
|

|
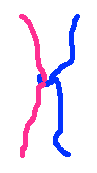
| Three parallel threads, with a few synchronization points. |
|

|
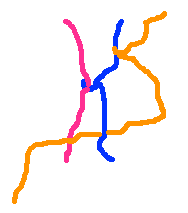
| Four f-ing threads! |

|

|
Many programmers cannot even handle very simple threading problems correctly.
A programmer had a problem. He thought to himself, "I know, I'll solve it with threads!". has Now problems. two he
— Davidlohr Bueso (@davidlohr) January 8, 2013
With state machines, we have a relatively simple model that scales nicely wot various challenges in concurrency. This does not make concurrency problems vanish, but you have a good tool to solve challenges. State machines are relatively easy to debug, since you can check in which current state they are, and because you can look at a trace of events that explains how they got there.
It turns out, that state machines are also relatively easy to implement, and we can run many different state machines within the same thread. This means we can do a lot of concurrent things in just own thread, and just one busy while loop, which can make our programs quite efficient.
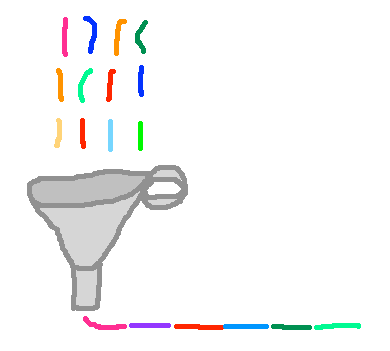
But how can a state machine do it? With state machines, we have a notation that motivates us to define behavior in short pieces, which are the transitions. Think of them as short little pieces of thread, as illustrated in the figure below. Threads of different color belong to different tasks. But because these tasks are executed concurrently, the state machine sorts them and executes one of them at a time. The states in between are just the ordering criteria between them. (If this analogy is not entirely clear to you now, don’t worry. You will understand more once we implement state machines.)
From Diagram to Code
So now that we motivated why we want to implement our state machines, how should we do this? How should we get from the state machine diagram to running code. You have previously already read about Degrees of UML. Remember, there were three ways of looking at modelling:
- Models as a Sketch: The models only serve the purpose to think and illustrate selected issues og of a system and are often only temporary, like on a piece of paper or a whiteboard.
- Models as a Blueprint: The models provide a detailed specification of the system, and are kept alongside the system, as part of the documentation.
- Models as a Programming Language: The models are so detailed that a compiler (in this case often called code generator) can take the model and derive the system code from it.
These different views on modeling have both benefits and drawbacks:
| Approach | Benefit | Drawback |
|---|---|---|
| Sketch |
|
|
| Blueprint |
|
|
| Programming Language |
|
|
To create code, we can in general distinguish between three techniques:
- Manual Coding: All code is hand-written.
- Framework and Support System: Code is hand-written, but it makes use of libraries and a framework for support.
- Code Generation: A code generator is a program that works like a compiler. Instead of source code, it takes a model as input and produces source code, for instance Python. It may use a framework to make the code generation easier, but this does not affect the fact that the code is generated completely from the model.
For the programming language approach, we need the code generation approach.
For the sketch and the blueprint approach, we can either use manual coding or chose coding supported by a framework. In the following, we want to use a library as a support framework to help us implementing the code for state machines. This is useful for a “Sketch” or a “Blueprint” approach to modeling. It will give us the flexibility to use all functionalities of Python, but use the benefits of state machines for synchronizing concurrent behavior.
The Idea
In the following, we want to build a support system to implement state machines in Python. Here are some elements that motivate the solution:
- The idea is to create a state machine in graphics, and then manually code it, supported by a library.
- Let’s provide a library in Python that takes care of many technicalities around state machines.
- Let’s declare states and transitions as Python data structures, so that they can be programmed quickly and also easily changed. We can reduce the amount of code to be written.
- Let’s keep a very strong connection to Python and how things are done there. It should be easy to combine the code for state machines with any other code in Python.
- Because we have some support library, coding is much easier than coding the state machine entirely manual. This means our approach is more automized than the “Model as Sketch” approach, but less dependent on a specific tools like with the “Model as Programming Language” approach.
- The library has an API, so that there are indirectly some rules how state machines are coded. This makes it easier to understand how diagram and code belong together. This property is also called traceability.
State Machine Execution
As a first overview, have a look at the following whiteboard sketch:
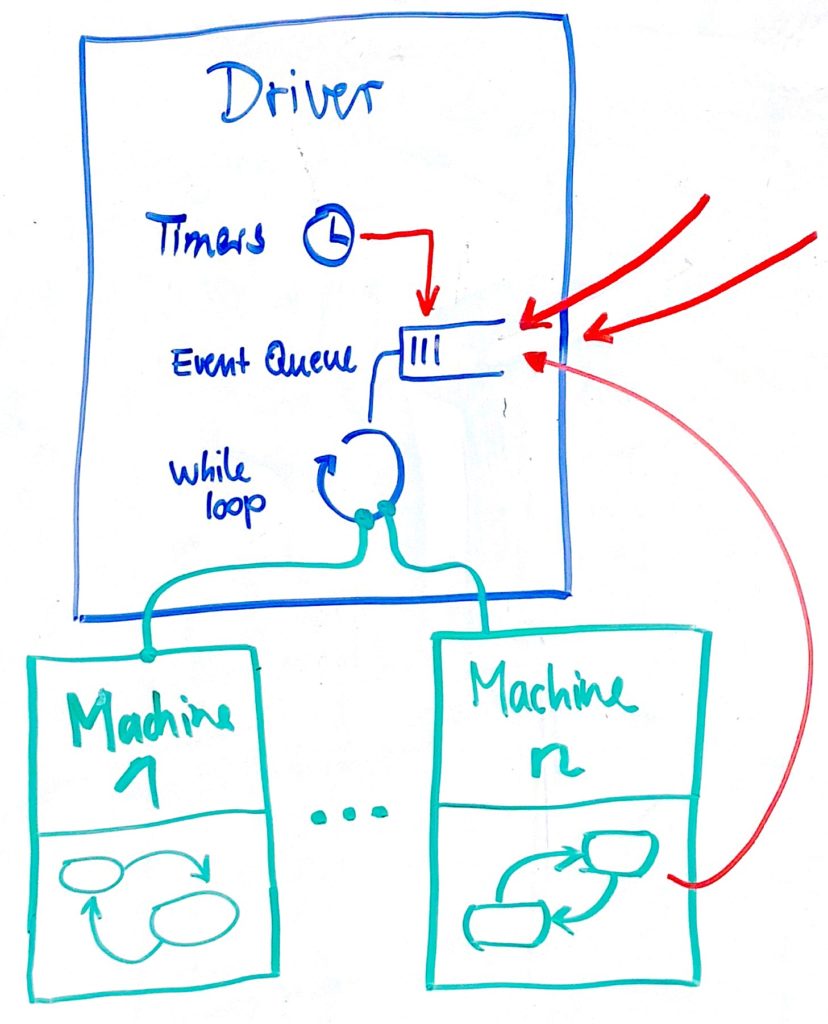
- A state machine diagram is implemented by an instance of Python class Machine (in green). It takes care of the sequence in which transitions are executed, which states there are, and which (Python) methods are called by the actions in the state machine.
-
A driver (in blue) is executing several machines. One driver keeps track of several machines. It has one event queue that collects all the events (signals and timer expirations) for its state machines.
-
A driver also has a single while loop, running in a single thread. From this while loop, a driver executes all the state machines assigned to it, one at a time.
-
A driver also manages all timers for it state machines.
-
The red arrow show that events for the queue come from expires timers, signals sent by other state machines, and signals that are sent by components out of the control of the driver.
We will go through machines and drivers and their Python API in the following notebooks.
Python Notebooks
Install Python Notebooks on your computer, following these instructions. In case you have trouble, find help on Piazza!
Visit the Github repository https://github.com/falkr/stmpy-notebooks and download it.
You can either pull it via Git, or download directly the contents as a ZIP file, with this link:
https://github.com/falkr/stmpy-notebooks/archive/master.zip
Again, ask on Piazza if this is not working for you.
Install Python Packages
First, install state machines for Python, stmpy:
pip install --upgrade stmpy
We also need our own widgets in the notebooks, so run the following two commands:
pip install ipywidgets
jupyter nbextension enable --py widgetsnbextension
State Machines in Python – Part 1
- Start your Jupyter Notebook server
- Open the first notebook, stored in the file State Machines in Python – Part 1.ipynb
- Complete all the material in the notebook and come back here!
In this notebook you learn all the basics of state machines in STMPY.
State Machines in Python – Part 2
- Work through the content of the notebook State Machines in Python – Part 2.ipynb
You learn how we build very simple user interfaces in notebooks. We also use signals to send data from the user interface into the state machine.
State Machines in Python – Part 3
- Work through the content of the notebook State Machines in Python – Part 3.ipynb
You learn how you can also create states that have entry and exit actions.
State Machines in Python – Part 4
- Work through the content of the notebook State Machines in Python – Part 4.ipynb
You learn how to support decisions in state machines using compound transitions.